James and I had already painted the body white. And James had done a great job. :( But we decided against R2-D2 so it had to be redone.
R2-X2 was the chosen droid. So i went to halfords with our chosen paint code, only to find it was nearly 3 times the price to specify the code! They have a stock range too, they were much more reasonable, so after a while pondering different options i decided on the Rover Brooklands Green and a Mercedes Pearl Metalic Black. Not a bad match in the shadows. :)
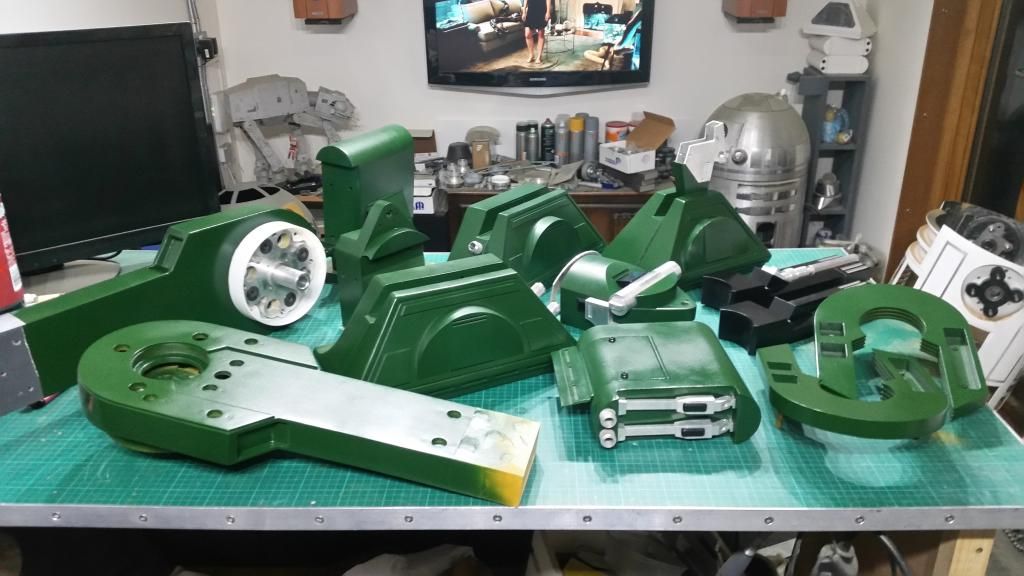
I started by getting Colin over. He gave me a painting 101 lesson and left me to it. I started with the feet and legs. Over about 3 weeks i have been slowly prepping and painting parts. Some parts took 4 or 5 cycles of sanding filling and priming to get right, but it was worth the effort. :D
I managed to clear Oxfordshire of that colour in that time, James even cleared out the Reading store.
The paint finish is not mirror smooth, i have some minor clear wrinkling and the can fresh orange peel is still there, but he is fine for our needs. The body had major issues first time, so i sanded the lots and started fresh, 2nd time is much better. Im still learning. :D
I got all the legs painted up first, so they could harden for a little before assembly. I spent quite a while before painting making sure everything would easily fit when painted. It paid off, they slipped together beautifully. :)
Then James came over and worked his magic with the airbrush on the Horseshoes and the shim details, to make the right bits silver. :)
The horseshoes and boosters currently click on with magnets. For an event droid this would be sound, but i think i will pop some silicone in the holes too eventually, just to give them a little more grip for off road use. :D
The leg to body hubs are 3D printed, so i covered those with brushed aluminium vinyl, added a small strip of that for the leg groove and the legs are 90% done. Just the USD to finish and then glue the last bits in place at the end.
I ordered some nice black hardware for the leg to ankle and battery box hatches. Loads better. ;)
There were a few masking dramas and pulled paint, so some parts were re-cleared but it's hard to spot and i can always touch it up later.
So with the legs painted the body got done. Happily most of the bits needed arrived over the last few weeks, so i was ready to install a lot of the body bits.
The pocket vent holes were not the right radius, so i had to remove the surround top and bottom on the body so it could sit in right. The back is perfect, the front does poke out a little. But good enough. So with pocket vents done i dry fitted power couplers, coin returns and octos. Then looked into the side vents and speakers.
I bought some 100mm speaker rings in 18mm mdf. I shaped these to fit the side vent backs. Then marked and cut the holes in the back to expose the speaker through it. Using 8 CS wood screws and a ton of powerflex superglue i screwed them together. Then filled any gaps and filed and painted them in black. The speakers will mount directly to the backs. :D
I then opened the holes to fit and moved on to the doors. :D
The big door was the challenge here. I had cut the door out assuming we would make a door. So the cut-out wasn't great. But needs must and it was the best i had. I squared it up and fitted the trim with lots of glue, then flattened the back as best i could with sand paper. Eventually i glued on a 3mm styrene back and filled and primed it all. :D I think i will paint the back black along with the hinge. :D
The centre vents almost friction fit. :D So easy job there. Then i ground out the knob of the octo port as i had for BHD; that will be the volume. I hated attacking Dave Shaw's amazing part, but needs must. Once all dry fitted i painted the required and started bonding them in with HP-40. Should take the bumps without being totally rigid. Fingers crossed.
I am waiting for my Coin Slots (in the post) and i need to look at mounting and setting up those master utility arms and mech from IA parts. And hinges need mounting. But good progress. Almost time for the dome. That is it for now. I may slow for a few weeks and look at BHD. But X2 is really coming to life and almost able to undergo the next round of testing. :D


No comments:
Post a Comment