Wednesday, 3 June 2015

Body and UAC work - Delayed update

This is all work i did a while ago, but forgot to update the blog!  :D

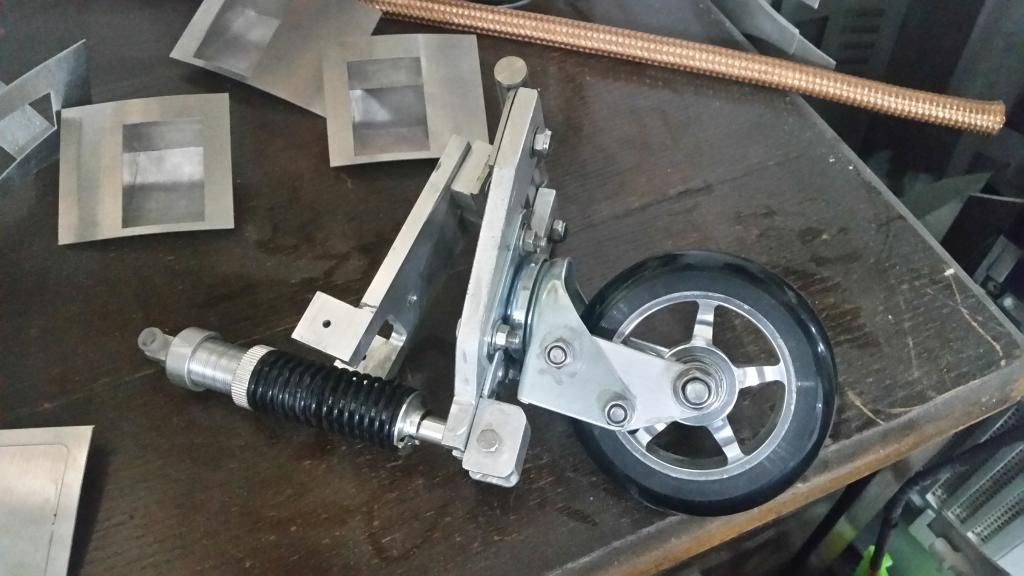
I moved the pivot points on the front suspension, it did the opposite of what i expected. :(  The change in wheel size and addition of the caster has altered the physics. :D  So the caster needs to be moved forward and i think the shock needs to go back to where it was.  But currently he isnt riding like he should.

So i stripped the ankle, remounted the caster and lowered the mech.  It is riding a little high, but it is so much better.  New legs for the caster and a slight height adjustment should get the ride height about right and give a little more firmness to the shock effect.  But we might test with it as it is.

Also need to rework the drive mounts a touch, half the bolts have now threaded on the small depth plate, may look at adding some inserts.  But that can wait.

Back on with the main build and continued working up.  I cut some styrofoam and made a battery holder, and bonded that in.

I then added the speaker back mounts and velcros for the Boom Mat covers.


Then i did the volume knob and octo port.  Same setup as BHD.  But all bonded into place. :D


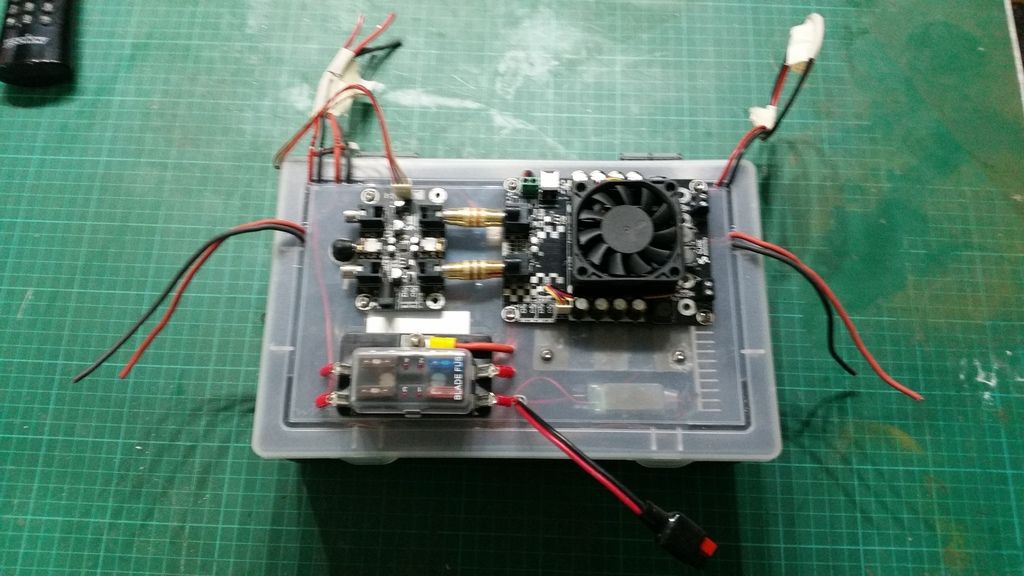
I was then thinking about the electronics.  I didnt want to add too much weight, but wanted it neat and easy to work on.  So i decided to mount all the electronics into a box.  This may change, but it will be ok for now.


I might redo this.

The UAC (Utility Arm Carrier) has been bothering me.  I have the RotoPod mechs and Master arms, with the twist paws.  So it had to be set well and be a reliable set up.  The mechs are designed for the COM8 frames, so i borrowed the JAG plans and manually transferred them to Cubify.

I cut out the old one. and enough of the top ring to allow the new one to be fitted.


After a few test runs i ended up with a nice solid frame and mount.  But the bearing were nasty, so i ordered some more, they rob a little space, but still fit fine, it is a little tighter.  The assembly isnt the easiest, but is possible. :)

I glued it all with the arms in place, so they sit pretty straight, there maybe a small amount of adjustment of the skins needed but dry for they seem fine without paint.  Im yet to sort the spacer heights, so fun still to be had, but I haven't looked at the master arms yet so will wait to bond it to the droid.  I hope all 4 servos and the LDP lighting will be tested before it goes in forever.

This is the last prototype, before i redid it in black. :)


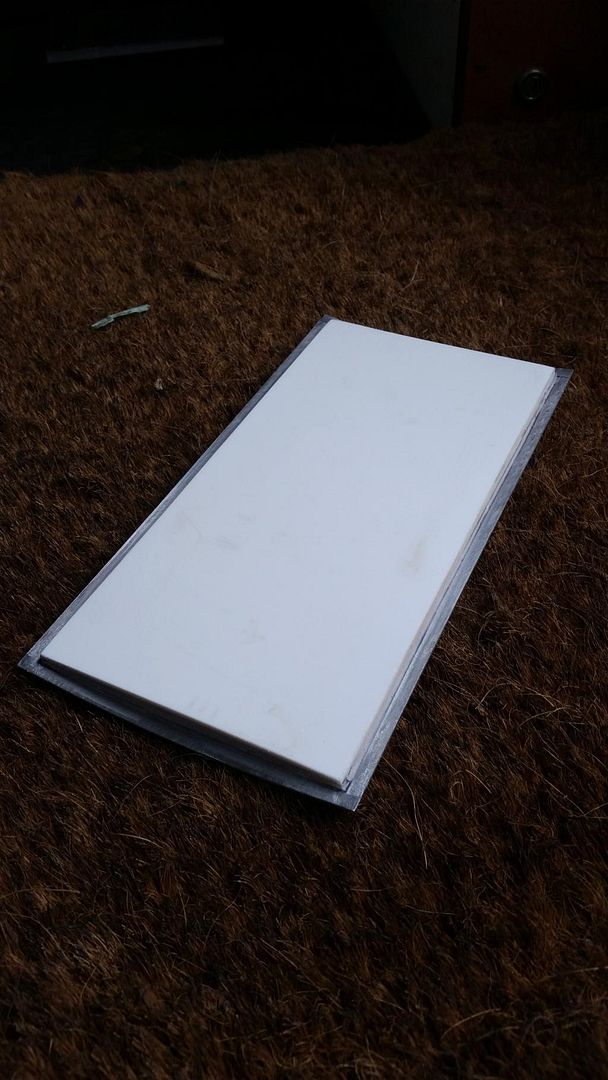
I had the CBI panel in black, but added top and bottom parts to make a shallow pan for it.  The panel sits about 1-2mmm from the edges and so it quite prominent in the space.  I like it. :)

For the big door i wanted to leave the options open.  I added a pan surround and bonded it in, then made my own blank SK10 panel surround and a back plate.  I did a horrible job on the glue, so painted it, and wedged it into the back.  I will replace this once i know what im doing with the touch screen pad.  Again my gluing was horrible on the surround.  But i found some carbon  fibre vinyl and covered the mistake quite nicely.
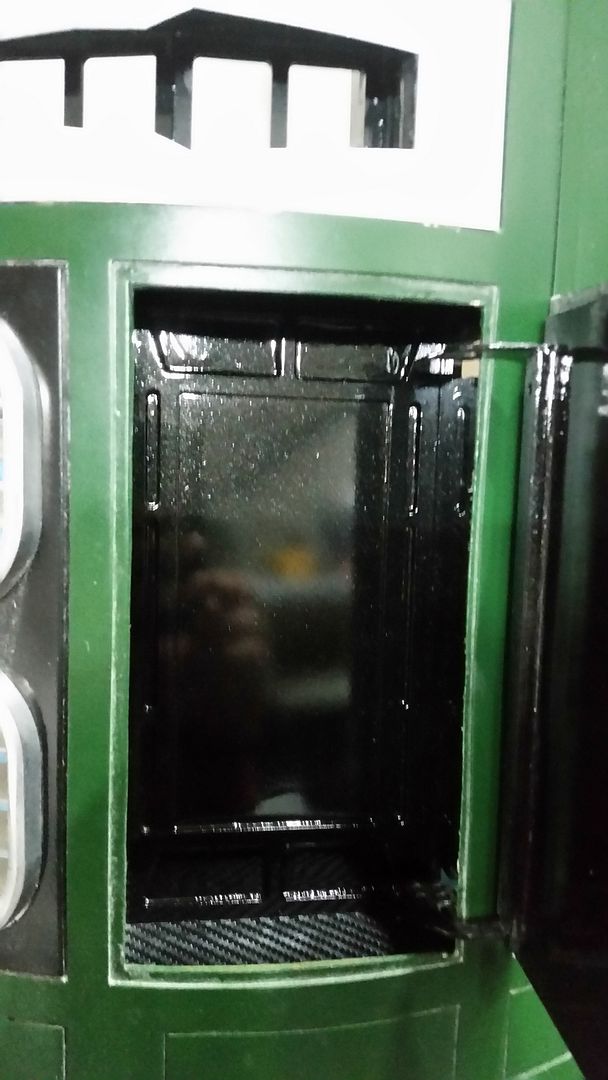


So body almost done.  Some electronics and some testing then we can bond in the UAC and the top ring and get testing. :D  There has been more weight added than id like, but hey ho. ;)


Wednesday, 4 March 2015

I really don't like painting.

I had avoided painting BHD, but there was no getting round it this time.

James and I had already painted the body white.  And James had done a great job. :(  But we decided against R2-D2 so it had to be redone.

R2-X2 was the chosen droid.  So i went to halfords with our chosen paint code, only to find it was nearly 3 times the price to specify the code!  They have a stock range too, they were much more reasonable, so after a while pondering different options i decided on the Rover Brooklands Green and a Mercedes Pearl Metalic Black.  Not a bad match in the shadows. :)


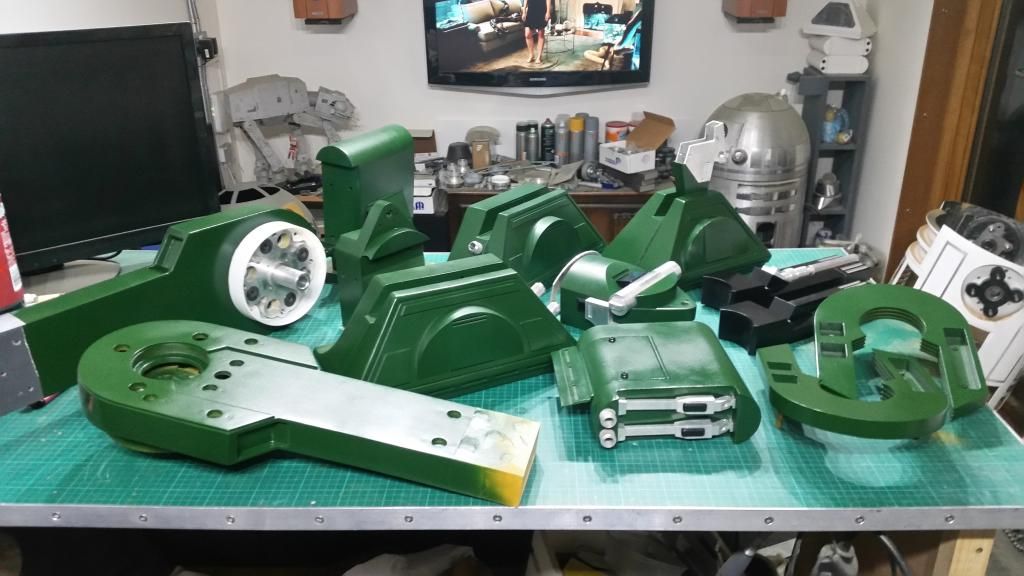
I started by getting Colin over.  He gave me a painting 101 lesson and left me to it. I started with the feet and legs.  Over about 3 weeks i have been slowly prepping and painting parts.  Some parts took 4 or 5 cycles of sanding filling and priming to get right, but it was worth the effort. :D

I managed to clear Oxfordshire of that colour in that time, James even cleared out the Reading store.

The paint finish is not mirror smooth, i have some minor clear wrinkling and the can fresh orange peel is still there, but he is fine for our needs.  The body had major issues first time, so i sanded the lots and started fresh, 2nd time is much better.  Im still learning. :D

I got all the legs painted up first, so they could harden for a little before assembly.  I spent quite a while before painting making sure everything would easily fit when painted.  It paid off, they slipped together beautifully. :)


Then James came over and worked his magic with the airbrush on the Horseshoes and the shim details, to make the right bits silver. :)

The horseshoes and boosters currently click on with magnets.  For an event droid this would be sound, but i think i will pop some silicone in the holes too eventually, just to give them a little more grip for off road use. :D


The leg to body hubs are 3D printed, so i covered those with brushed aluminium vinyl, added a small strip of that for the leg groove and the legs are 90% done.  Just the USD to finish and then glue the last bits in place at the end.

I ordered some nice black hardware for the leg to ankle and battery box hatches.  Loads better. ;)

There were a few masking dramas and pulled paint, so some parts were re-cleared but it's hard to spot and i can always touch it up later.


So with the legs painted the body got done.  Happily most of the bits needed arrived over the last few weeks, so i was ready to install a lot of the body bits.

The pocket vent holes were not the right radius, so i had to remove the surround top and bottom on the body so it could sit in right.  The back is perfect, the front does poke out a little.  But good enough.  So with pocket vents done i dry fitted power couplers, coin returns and octos.  Then looked into the side vents and speakers.

I bought some 100mm speaker rings in 18mm mdf.  I shaped these to fit the side vent backs.  Then marked and cut the holes in the back to expose the speaker through it.  Using 8 CS wood screws and a ton of powerflex superglue i screwed them together.  Then filled any gaps and filed and painted them in black.  The speakers will mount directly to the backs. :D


I then opened the holes to fit and moved on to the doors. :D  

The big door was the challenge here.  I had cut the door out assuming we would make a door.  So the cut-out wasn't great.  But needs must and it was the best i had.  I squared it up and fitted the trim with lots of glue, then flattened the back as best i could with sand paper.  Eventually i glued on a 3mm styrene back and filled and primed it all. :D  I think i will paint the back black along with the hinge. :D


The centre vents almost friction fit. :D  So easy job there. Then i ground out the knob of the octo port as i had for BHD; that will be the volume.  I hated attacking Dave Shaw's amazing part, but needs must.  Once all dry fitted i painted the required and started bonding them in with HP-40. Should take the bumps without being totally rigid.  Fingers crossed.


I am waiting for my Coin Slots (in the post) and i need to look at mounting and setting up those master utility arms and mech from IA parts.  And hinges need mounting.  But good progress.  Almost time for the dome.  That is it for now.  I may slow for a few weeks and look at BHD.  But X2 is really coming to life and almost able to undergo the next round of testing. :D


Friday, 13 February 2015

Shock shoulders

Here are the shock shoulders. 

They comprise of a go kart axle bearing attached to the body, a bicycle seat post clamp, some hardware, a few CNC bits and very soft skate bushes.  The body bit is threaded plastic.  The leg side is ali.  The 4 long studs go through the bushes, allowing the kart bearing limited movement.  The kart bearing also allows a little off axis movement and the bushes help allow that too.  And they can be popped off if needed. :D

The 2nd set of holes allows the legs to be put on in 2 leg mode.  Just in case. ;)


The blots shown here have now been replaced.  But James earned that update. :)


Big thanks to James Kitson for doing me the 3D printed surrounds. :D

Bantha Tracks

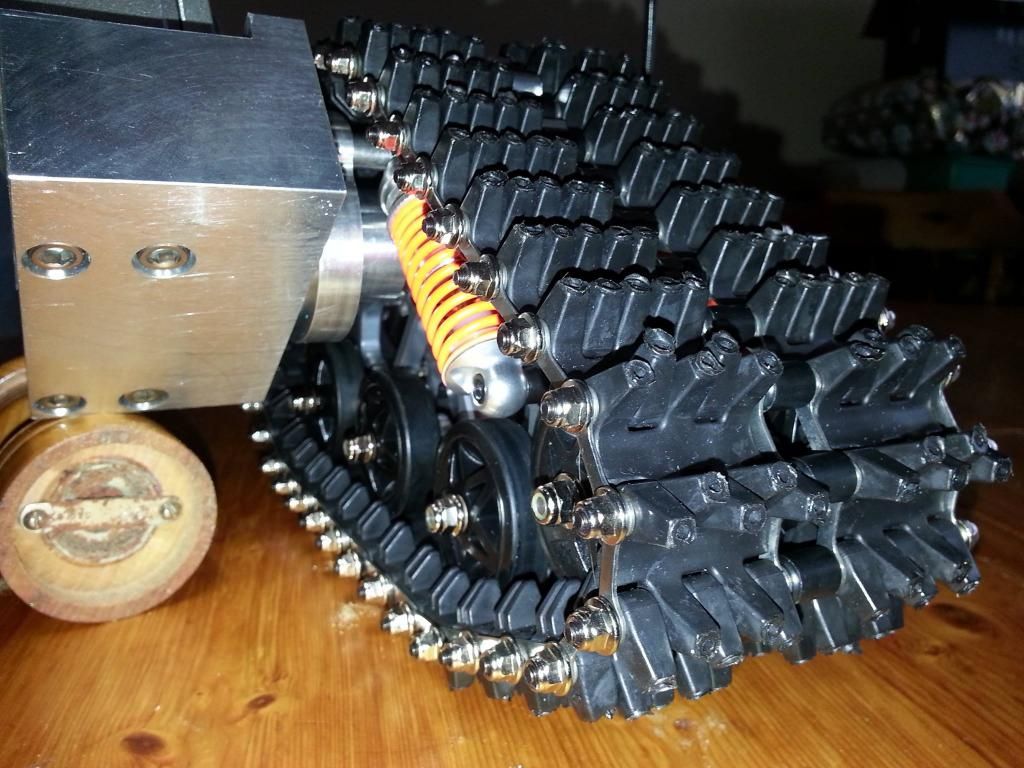
First up were the Tracked feet. :D  The Track drives are RC Sand/Snowmobile Buggy Conversion kits.  We are running these via a custom mount and gearbox powered by a modified NPC motor.  Roger has done us proud they are a beautiful piece of work.  We modelled the feet in Cubify with a 40mm ride height and Roger helped make our dreams come true.   They are geared to run at no load with an approx. 4mph top speed.

These will not be used alone, we have some other things we are trying in combination with the tracks to change the dynamics of the forces.  We hope for the better. ;)


The testing so far

First run highlighted how different this build would need to be.  Rattles everywhere!


So stripped and fixed or removed or taped up the lose bits and any easy fixes needed.  And tested again.


Was good in the garden so we went out and about, apart from the centre noise, it was pretty good.


After that testing and playing with the base, we decided we needed to redo the shoulder mech a little, to take out play, that is now done, but we wont be able to test again till he is back in 1 piece.

A long time ago in a galaxy far far away. . . .

As you may have gathered we are part way through this build, not far in, but a lot of the planning and buying is done.  So time to try and catch you up.

So far we have built and tested the feet track drives, shock shoulders and MK1 of our centre foot mech.  After that testing we have applied a few upgrades and the tracks and shoulders are done. I will let James update you on his stud farming exploits.

The centre foot is on to Mk2, we were using a Rotacaster, but too loud.  So we are about to test a 100mm skate wheel on a custom caster base.


We were very lucky to get a Crash droid base.  This is light and strong.  Perfect for our needs.  The centre of gravity will be played with in this droid, we are using ali feet and adding weight to them, and then trying to reduce the weight of the rest of the droid.  The hope is he will act like a droid half his height.

One of the major factors we wanted to address was the rigidity of the structure, any impact currently carries through the solid structure and makes an already unstable robot really prone to tipping when abused.  So the Shock shoulders (again James may want to update here, our concepts, my design, his work to create it, and he did a beautiful job) allow the legs to move in plane of the leg, pivoting on the centre of the shoulders and absorbed by soft rubber skate bushes.  They also allow the legs to be easily removed.

Other nice touches so far include magnets to hold on the horseshoes, boosters and dome.  But im really falling in love with this little droid, he already has a character and he is only a pile of bits at the mo.  He is a little more relaxed and not as formal as BHD, im really looking forward to giving him some real abuse and testing him where no droid has gone before. :P

I started painting a couple of weeks ago, for the green i chose Rover Brooklands Green, it is a really nice late 70s green, very suitable for ANH droid. :)  Most parts have required 3-4 cycles of fill sand and prime before 3 coats of green and 3-4 of clear.  I am currently unsure if i will polish the paint, or leave the orange peel, the slightly satin look is actually quite nice.  I hope to have all the leg elements for all 3 legs painted and drying for Monday.  Then on to the body. :)


The droid will still be an eventing droid as the main purpose.  It will have 9 dome doors on servos, and HPs, and 2 body doors and utility arms and a few other extras.  But at half the weight of BHD and a lot more practical to drive anywhere, im hoping X2 will take the chore out of eventing, and the risk of a bad back. :)


The new droid!

From the creators of R2-B4, and R2-BHD...

A Brad Robot productions...


R2-X2!


It was time for a new challenge.  Being the geniuses we are, we decided to get to work on a new project, something we hadn't seen done before.  A top loading droid! An off road droid!

Most droids, including ours, are designed to run in perfect surface conditions.  A gym hall floor for example.  Nice, flat, hard surfaces.  But when did we ever see R2 in the films limited to a gym?

So there was lots to consider.  Suspension, traction, shock absorption etc.

We were in two or three minds about what to do for the feet drives.  2 driven wheels as fat as we could go, with suspension built in?  Caterpillar tracks seemed ideal, but where were we going to get...


Oh ok, sweet!

One evening searching the web and we happened across these bad boys.  They're designed as an upgrade for remote controlled cars, to make them drive on sand and snow.  Perfect!

Looking at the measurements, the fit inside one of R2's feet seemed too perfect to ignore.  So we took a punt, and what do you know?


These even have suspension built into the them.

Now, with the perfect fit inside the foot, where do we put the motor?  Well, the usual NPC wouldn't work, the drive shaft on that would be too high (we wanted a high ride anyway for clearing all the crap we're going to drive it through).  But NPC's are reliable, and bullet proof.  But maybe a little slow on a direct drive.  

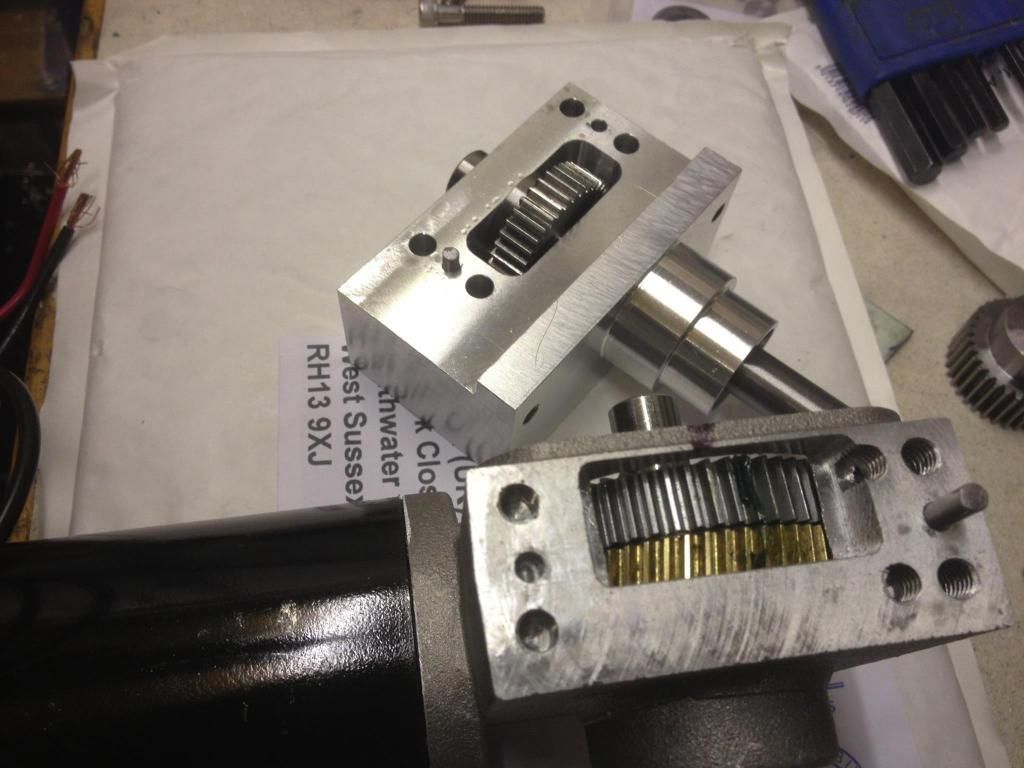
So, chatting with the father in law, we ended up with this!


Custom gear box anyone?

I'll leave you with that for now, I'm sure Brad will chime in soon :)